This is a very difficult stage, even if you don't use all the fastest strategies. There is a lot of climbing, and a lot of enemies to take care of along the way. The strategies for any% and 100% (with iceless) are identical, you have a bit more flexibility with 100% without iceless, because of beating eagle and mammoth first. If you do the route that puts eagle 2nd and Kuwanger 3rd, you can do a bit of a different turtle climb.
any%[]

Basic kuwanger stage
Basic Kuwanger stage
First half[]
The first climb can be as difficult as you want to make it. For the second ladder, despite being commonly done, it's faster to just grab the ladder than go all the way to the wall and kick off before grabbing on. Dashing right and grabbing the third ladder is almost as fast as doing the jump off the left wall. There isn't a simple way to get around the green guy fast, so it's best to go off the right wall and hop up to the next ledge.

The jump can be tricky, but there's a visual cue you can use until you get a feel for getting the right jump height. If you jump high at the wall and slide down, when X's hand is in the square block, you can dash jump around the ledge without bonking your head and getting the right height.
For the rest of the climb, you can either wallkick off each ledge and grab the final ladder, or try to land on the platform in front of the first wall turret and on the ledge across from the second green guy (this only avoids doing 2 wallkicks, so not a huge time save or anything).
Kuwanger first climb
basic

Kuwanger first climb harder
harder

Kuwanger first climb hardest
hardest
The harder way up the first climb is to gap jump the second ladder, and catch the ledge above the third ladder to skip it entirely.
The fastest and hardest way to do the first climb is to do the right wall strat, getting a 7 pixel dash wallkick very low on the first ledge which allows you to entirely skip the second ladder, saving about 30 frames.
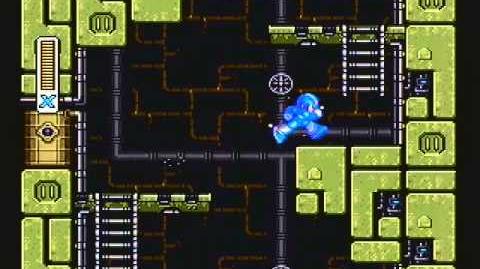
The next section is fairly straightforward, as long as you don't make big movement mistakes and just keep dashing and jumping, none of the lasers will hit you. There is one damageboost off a laser right near the end of the hallway to edge X on top of the ledge to avoid having to do a wallkick. If all goes well, you can cancel the hitstun from the laser hit as you get the needed height to get onto the ledge. It's not a big deal to miss it and have to sit through the recoil animation. Dash across the platform, dash jump at the edge, and grab the ladder to get ready for the turtle climb. The final laser shouldn't hit you if you missed the perfect damage boost, but if you did get the damage boost there's a window of time for your dash that will get you shot out of the air. Pressing dash immediately after getting hit by the laser will help you get the dash off as soon as possible, if you miss it just allow yourself to walk for a third of a second or so before dashing. The time lost to the walking is nothing compared to the time lost of getting shot out of the air.

Kuwanger second hallway demo
Second hallway + turtle climb
Getting past the turtles can be tough to get used to, it's not as simple as just going fast, there are a few small pauses you need to include to avoid being shot. If you jumped from the right location before grabbing the first ladder, the first turtle shouldn't get the chance to shoot at you if your dash jumps are quick enough. Occasionally, the turtle may shoot at you before you get a chance to finish climbing the ladder, if you're high up enough (very close to the top) you can hold left or right and cancel the hitstun against the side of the floor and just jump up. After climbing the second ladder, dash jump to the raised platform in front of the turtle and dash across it, your goal is to approach the turtle really low so its first shot goes over you as you get to the ladder, the second shot will miss. Walk toward the third turtle and dash jump as it is about to fire its first shot. Let the second shot hit you near the top of the ladder, cancel your hitstun by holding left or right, then wallkick to get yourself on the platform with the final turtle. Since you're on invincibility frames, just dash toward the turtle and jump for the ladder. If you go too fast, the second shot will hit you, so if you find yourself getting shot, slow down a little on the wallkick after the damage boost.
Land on the elevator as soon as you can to get it moving faster. There's a bug with the spike walls where if you try to wallkick off them (without getting close enough to bonk into them) you get hit but don't take damage. You can technically use this to climb the spike wall, but you have to kill yourself when you reach the top and this saves under a second with TAS execution, so it's best to ride the elevator all the way up. Standing all the way to the right, up against the spikes, will get most of the flying enemies to miss you. Only one will actually crash into you, but you can just wallkick off the spike wall to avoid taking the 1 damage if you want to.
Outside climb[]

Outside climb
The most simple way through the outside climb (shown in the video at the top of the page) is to just grab every ladder when you can and use charged buster shots to kill all the ladder yadders in your way. To reduce lag, switch to ice for the 4th ladder yadder. There are two optional gap jumps you can do, and a double wallkick on the wall with 2 platforms extending out to get a little extra height on the ladder.
The traditional way of killing the 3rd ladder yadder is to dash toward the ladder, and jump when you're underneath it before firing. The faster way is to dash and jump early and fire at the peak of your jump. It's a much smaller window to kill the enemy, but not terribly difficult to learn.
Inside climb[]

Kuwanger inside climb
Very tough section of the stage to do well, lots of back and forth movements and you're really on the clock for just about every movement because the platforms you use are moving back and forth once they're spawned. For the first moving platform, you can either wallkick off the side of it or kill the enemy and get on top of his platform. Getting on top of the platform saves having to do 2 wallkicks, but the wallkicks are much more lenient on the directional and dash inputs. If you go for killing the first turret to use the platform, using a charged buster shot plus one dash shot to kill is easier than using a point blank ice shot. For all the other platform turrets, use a point blank ice shot.
When you get on the small ledge on the left, you can either do 2 wallkicks on the left wall to reach the next moving platform, or jump to the edge of the platform on the right and then immediately dash jump left to only wallkick on the wall one time. If you move quickly, you can climb the ladder in time to beat the first bullet and avoid taking damage. Dash jump to the left and do a dash wallkick off the wall and release the dpad, when you get lined up with the turret coming down toward you, fire an ice shot into it to kill it, then you can resume climbing. Again, with fast movement, you can climb the ladder (or gap jump) before either of the next 2 bullets can reach you. At the top of the ladder, begin charging a buster shot for the Kuwanger fight, you can even just hold shoot when you kill the final turret and just swap to buster and begin charging whenever, to avoid accidentally firing a buster shot while on the ladder or something like that.
100%[]
All of the strats that apply in any% apply in 100% as well. Depending on route there are a few additional things you can try to speed up the turtle climb.
Turtle climb with iceless, eagle second[]

Turtles Uncharged Tornado
Not an optimal route, but if you're comfortable with getting iceless you can instead opt for eagle as the second stage to get the boss fight rng out of the way faster. With exceptionally bad patterns you won't have to waste the extra minutes going through kuwanger and can instead reset earlier (if you're going for a really good time). There's only one alteration to the stage, you can use tornado during the turtle climb to kill the final two turtles.
Turtle climb without iceless[]

Turtles Charged Tornado
Since you have the buster upgrade and the tornado weapon, you can use the tornado to speed up the turtle climb, killing two with a charged tornado and the final turtle with an uncharged tornado.
Kuwanger heart[]
With charged ice[]

Ice heart
There are two methods to getting the heart itself with the charged ice. The simple way is to drop the sled at the top of the climb and ride it out underneath the overhang the heart is on and jumping off to get the heart. The faster way is by planting the ice sled in the wall and jumping off the edge of it. To get the right positioning, just do a dash wallkick off the left wall, and fire the sled when X reaches his max distance from the wall (with no dpad input).
Iceless[]
Babanimx's iceless guide http://www.twitch.tv/babanimx/c/5597864
There are multiple ways to go about getting iceless,the most consistent is probably getting a precise kick at the bottom of the wall at the right height so that two wallkicks will get you to just the right position to do a 7 pixel dash wallkick and reach the ledge the heart is on.
Another method is to do a double wallkick as well as a single wallkick, this can give the right position as well, though getting just the right rhythm for the double wallkick each time can be challenging.
Common mistakes in iceless include:
- Not getting the right position to kick off of.
- Not holding the final jump long enough, so not getting the right height to reach the platform.
- Going too far to the right. X can only kick off a wall if he's within 7 pixels of it, so you can't go too far to the right.
Kuwanger fight[]

Kuwanger tango
There aren't many reliable strategies for the Kuwanger fight. Generally people either get Kuwanger trapped in a loop trying to dead lift you, or jump around like maniacs hoping not to get hit. It's best to go with the grab loop. The way it works is you release your charged shot (or if you forgot to charge, a dash shot works fine too) at the start and rush toward the center, ideally you get a bit to the right of center, the closer you get to Kuwanger the better. Kuwanger can stop on a dime when he's trying to grab you and switch into teleports or throwing his boomerang, so you don't want to give him the time to change his mind. When he gets very close to you and begins his grab, jump upward. Shoot him when you land (and when he's out of invincibility frames), and repeat the process. You can keep him locked in the loop until he's at half health, at least. At some point he'll decide to start teleporting, in which case, ease yourself over to the center and just fire mid-charge shots at him when he comes out of his teleports. He will not teleport on top of you, the worst that will happen is he'll teleport close to you and try to grab, you can use that opportunity to dodge his grab and get a full charge shot in, or just hit him as soon as he becomes vulnerable like normal.
Another thing to note in the Kuwanger fight is that, when he teleports, he actually travels at a regular speed, so you can narrow down where he'll pop up based on how long he takes to teleport (for example, if he's on the extreme left and teleports for a substantial amount of time, he'll probably appear on your right).